hi there!
I’m so glad you’re here with me today to learn about the medieval world — and hopefully, to take a little time for yourself. Today, we’re doing two things:
- First, we’re going to learn a little about Hildegard of Bingen, a medieval nun, and her work.
- Next, we’re going to look close-up at some images from Hildegard’s most famous work, Scivias.
- Finally, we’ll do an embroidery pattern together that’s based on one of these images.
Every activity from In Every Sense focuses on one or more specific sensory experiences — this one deals with sight and vision as we look at the art of Hildegard and as we make our art, and we’re also going to be making art of our own, which is kinesthetic since we’ll be moving our hands and bodies to do so. Plus, the finished product will be three-dimensional — even without looking at the finished piece, you can run your fingers over it and feel the different stitches.
If that sounds good to you, let’s dive in.
A small and gentle reminder: as always, these activities are more about how the act of creation makes you feel and less about the thing you’re making. Together, let’s try to focus more on the act of creating something new and less about whether or not it looks “good” or “right.”
part 1: learn a little
If you’ve done some of the other activities on the site, you might be familiar with Hildegard of Bingen and her book, Scivias, already. Neat! You might already know some of what’s written below, but in this activity, we’ll explore a little bit more about some specific images in Scivias and how they lend themselves to fiber art.
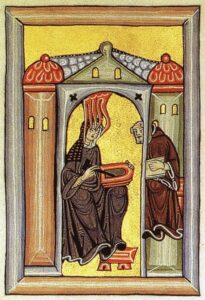
Hildegard of Bingen (1098-1179) was a prominent nun and abbess in what is now Germany. She also did a whole lot of other things — she wrote theological books and letters and sermons, she composed music, she studied anatomy and practiced folk medicine, she created a constructed language with its own alphabet — and more.
As with some of our other activities about Hildegard, we’ll be focusing here on her book Scivias, which is based on her experiences with visions she said she received from God. The most famous manuscripts of Scivias are full of some really beautiful and striking images that illustrate her visions, and on the surface, they seem like yet another example of lovely medieval illustrations. Yet what might we learn if we look a little closer at some of them?
The inspiration from this project came from a really neat presentation of Margot Fassler’s back in 2014 (you can watch it on YouTube here, and I suggest you do if you have an hour to spare). At one point, just after the 45-minute mark, she says:
“We realized one day, deep in thought over this issue, that the images are made of threads, of appliques, of cloth, of stitches. For many reasons, the images grew from being first designed and worked as embroidery, we believe. We know the nuns of Rupertsberg were dedicated weavers and needleworkers. A passage from Hildegard’s contemporary mentions a room for weaving at Rupertsberg, another of their embroidering in the cloister.”
She goes on for a few minutes to talk about how the images of Scivias resemble embroidery patterns, and says that she and her team believe that the images in the manuscripts of Scivias are based on embroidery done by the nuns there, possibly under Hildegard’s direct supervision (many of the manuscripts were made around the time of her death, and so we can’t be sure how much artistic direction she had over them). I recommend you watch these five minutes or so where she talks about this, but I want us to look for ourselves.
part 2: look at some art
You’ve probably already seen the images we’re about to look at together if you’ve done some other activities. But this time, I want us to look really closely at the way these are drawn. In fact, we’re going to zoom in on some details to see if we can see what Margot Fassler is talking about. Take a look below at these two zoomed-in images. The left is from the illustration of the orders of the angels, and the right is from the cosmic egg.


If you’re not overly familiar with embroidery, you might not know what you’re looking for. That’s OK! Notice the little dotted lines — the black outlines with white dots in between. What could that be representing?
When I saw these images and others that Margot Fassler shows in her presentation, I recognized it immediately — it looks just like backstitch. That got me wondering more — could, for example, those little white dots (the base of the red-and-white anemone-like things) we see in the right-hand image be another stitch, French knots? I’ve attached pictures of those stitches below (the left is backstitch, the right is French knots). What do you think?


I think it’s pretty convincing to me — at least that these images were inspired by stitching. And either way, it got me thinking about how to turn Hildegard’s images into an embroidery pattern. And if you’re ready, you can embroider your own cosmic egg-inspired piece.
part 3: make some art
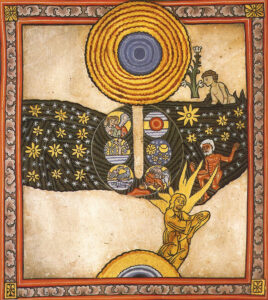
This pattern is based on Hildegard’s cosmic egg image, which you can see here below.

This pattern is substantially simplified, but it definitely gives the impression of the cosmic egg. Here’s what the finished product looked like when I did it.

This piece might seem complicated, but you only need to know how to do 4 basic stitches:
- satin stitch
- French knot
- backstitch
- detached chain stitch
They’re all pretty simple, and you can find great tutorials online. If embroidering is new to you, I recommend going to the DMC website’s page on embroidery basics to learn these stitches and much more about embroidery.
To complete this project, you’ll need the following:
- fabric suitable for embroidery (I bought a plain tea towel at my local craft store, but you can choose anything you like)
- a 6-inch embroidery hoop
- an embroidery needle appropriate for the fabric you chose
- a pencil (you can use a transfer pencil, a water-soluble fabric marking pencil, or honestly just a plain pencil)
- scissors
- paper with which to print the pattern (the pattern is designed for 8.5×11″ standard US printer paper)
- embroidery thread in the following colors:
- 1 skein DMC 349 (dark coral)
- 1 skein DMC 825 (dark blue)
- 2 skeins DMC 745 (light pale yellow)
- 1 skein DMC BLANC (white)
- 1 skein DMC 310 (black)
- 1 skein DMC 647 (medium beaver gray)
- 1 skein DMC 159 (light gray blue)
- 1 skein DMC 024 (white lavender)
I found all of these colors easily at my local craft store. You can also find them online on the DMC website or on other craft supply sites, usually for less than $1 each. If you’re having trouble finding some of these colors but you still want to do the project, drop me a line! I have a lot of leftover thread from testing this pattern and would be glad to mail you some. You can also always choose your own thread brand and colors — but these are the colors that I have specifically color-matched to Hildegard’s illustration.
If you’ve never embroidered before, you should also know that patterns very rarely use all 6 strands of thread that come in a skein, and so you should usually split them up. I used 3 strands throughout this project, so make sure you do as well — if you don’t, you’ll end up needing twice as much thread. Another thread tip: I used up just about a full skein of yellow thread, so I suggest above that you buy two, just in case. It always helps to have extra. You should have plenty leftover thread of all the other colors if you just buy one skein.
If you’re unfamiliar with reading embroidery patterns, I recommend reading through all the step-by-step instructions below before you get started (and even if you are familiar, you should read them, too!). Here’s how you’ll do it.
- Iron your fabric out and place it in the hoop.
- Print out the pattern and transfer it onto your fabric however you like. You can trace it from behind or use an iron-on transfer pencil. Your pattern should be about 5 inches high and 3 1/2 inches across. You can make it bigger if you like, but you’ll need more thread and a bigger hoop. I do not recommend making this pattern any smaller — it will be very difficult to get all the details in!
- Start by stitching the satin stitch areas. I worked from the inside out, but you can proceed however you like. You can refer to the pictures attached at the bottom if the chart gets a little confusing. Don’t worry if the yellow “flame” areas all look like one big lump — they will be separated out when you do the red backstitching at the end.
- Next, stitch the red detached chain (also called the “lazy daisy”) at the top center. Make a red French knot in the center, and then start on the three red French knots above it.
- Now, do the two red French knots on your blue satin stitch area. These are specially marked in the pattern.
- Next, you’ll stitch all the yellow French knots that represent the stars on top of the blue satin stitch area. You don’t have to follow where they are in the pattern — random is good.
- Next, stitch the clusters of white French knots within the black satin stitch area. After you’re done making all your French knots on the piece, you’ll need to “fluff up” the satin stitch, as it’ll probably have gotten displaced when you did the knots. That’s OK! Just fiddle with it with your fingers until it looks right.
- Then, you’ll make the red “anemone” lines coming out of these white French knots. These can also be rather random.
- Finally, backstitch around each individual yellow “flame” with your red thread. This will define all those bits that were smushed together before.
- Take your finished project out of the hoop, iron it flat, and finish the back with embroidery backing if you like. You’re done! Admire your handiwork!
That wasn’t so hard, was it? Of course, your final step is to send me a picture of your work so we can put it in the gallery. I can’t wait to see it.
All the links to download the patterns and other helpful diagrams are below. The only one you should need to print out is the technical chart, which you’ll print and transfer to your fabric.
Thanks for spending time today with me, with Hildegard, and most of all, with yourself. I’ll see you next time.
If you tried out this activity, we’d love to see how it went. Click here to submit your art to our gallery.


